Fine Gardening Magazine Article

sweet potato slips

My sweet potato slips made it into Fine Gardening™ magazine!

It’s a funny story.  Last year, I started my slips before Christmas and ended up with about fifty by the time I was able to transplant them to my garden.  I plant mine in containers, and I didn’t have enough room for all of them.  I have a neighbor who has an amazing garden, so I asked her if she’d like them.  She responded that she had enough of her own, but she wondered if she could borrow mine to take some photos of them.  It turns out that she works for Fine Gardening™ magazine and was taking photos for an article on growing sweet potatoes.  She said my slips were more “photogenic” than hers, so I lent them to her for the afternoon.

You can read the article here.  If you are interested in growing your own sweet potatoes, it has a lot of helpful information.

I purposely started my slips a little later this year, and ironically, spring got an early start here.  Today, I transferred my first two slips to the pots where they will stay until the threat of frost has passed for certain and I can transplant them outdoors.

20200315_161216(1)

I’m excited to get gardening!

Winter Garden Update: Starting Sweet Potatoes with the Dirt Method

For the last two years, we’ve started sweet potato slips as a nature study project and eventually transplanted them to a container in our vegetable garden.  The first year, we only ended up with some small potatoes, which I sliced up and cooked in a pot of chili.  Last year, we started them earlier and supplemented with some slips that I purchased.  The result was this:

sweet potato plant, container gardening

In October, frost was threatening and we dumped the bucket they were planted in.  We didn’t get a huge haul, but it was an improvement over last year.

sweet potato haul

I cured them in a cardboard box with some holes poked in it that I kept in the kitchen for warmth.  I finally baked the largest ones in the end of November.  They were so delicious!  They had a creamy texture that I’ve never experienced in a sweet potato before.

homegrown, baked sweet potato

I started looking up recommendations on the best time to start my slips.  I read that the fresher your sweet potatoes are, the more slips they will produce.  I also came across some videos from people saying that they had better success with the dirt method than the water method, which is what I’ve used in the past.  I was curious to try it, especially since some of my potatoes took so long to sprout last year that the potatoes started to get too mushy for the toothpicks to support them anymore and I ended up having to throw some of them out.

In mid-December, I followed these instructions to start slips using the dirt method:

  1. Buy some organic sweet potatoes.  Most conventional potatoes are treated with chemicals that prevent slips from growing.
  2. Get two disposable, aluminum baking pans approximately 3 inches deep.
  3. Poke a couple of holes in each side of one of the pans for drainage.
  4. Place something small in each corner of the other pan (I used extra Play Doh lids) and put the pan with holes inside, on top of the lids.  This gives extra moisture somewhere to escape.
  5. Fill the pan halfway with potting soil and lay your sweet potatoes in the pan, covering them part of the way with soil, but leaving the top half exposed.
  6. Put your pan on top of a plant heating pad and keep it in a spot where it will get either sunlight or direct artificial light during daytime hours.
  7. Keep the soil moist.  In a few weeks, you should begin to see little shoots emerging from your sweet potatoes and in the soil around them.  These are your slips.

Since I had some small potatoes left from what I’d grown, I used those.  I also put them in soil from the bucket I’d grown them in.  I began to see slips appearing in late January.  Once they began, they grew rapidly.

sweet potato slips, dirt method

Once my slips reached at least six inches high, I removed them from the potatoes by grasping them as close to the base as possible and gently twisting them one way and then the other until they came loose.  I placed them in a small jar of water in a sunny spot so they could grow roots.  Since my window sills are small, I found that herb jars worked well.  I made sure the water level was below the leaves.

sweet potato slips

Now that some of them have nice, established roots, I planted them in pots to keep indoors until the threat of frost has passed.  The sweet potatoes in the pan are continuing to produce new slips.  At last count, I had about forty slips altogether, counting the ones I’ve already picked and the ones that are still in the pan.  This is exponentially better than what I’ve been able to grow in the past using the water method.  I believe that using potatoes from my own garden made a difference as well.  They were grown organically, not treated with any chemicals, and very fresh.

sweet potatoes, slips, pots

Now, I just have to find room to keep all of these slips for the next two months, until I can plant them in the garden.  I think I’m going to need more than one bucket this year!


Here is a post on the water method and the nature study pages that we utilized last year.


Garden Update: Jarrahdale Pumpkin

Jarrahdale Pumpkin

Last October, we took a vacation right before Halloween.  When we returned and went to the store in search of a pumpkin to carve, we were dismayed to discover that all of our local grocery stores were out of large pumpkins!  We stopped at a small farmstand nearby instead, where my son found this beauty:

kids with jarrahdale pumpkin

It was quite heavy and a bluish-green color.  I balked at first, when I saw the $30 price tag.  However, the woman who was working there assured me that it was very good for cooking, hence the price.  I ended up with a freezer that was full of beautiful, dark orange pumpkin flesh that I used to make lots of pumpkin soup and pumpkin pie.

I also saved some of the seeds by fermenting them.

fermenting pumpkins seeds

You can read about the process to do that here.  When they float on the surface of the water like this, it means they are viable seeds.

saving pumpkin seeds

In the spring, we started some of the seeds indoors and transplanted them to the garden when the plants were big enough.  I searched online to figure out what kind of pumpkin it was, and it appears to be a Jarrahdale pumpkin.

pumpkin plant

I also started some regular pumpkin seeds that I bought, but the Jarrahdale seeds that I saved grew much more robust plants.  Unfortunately, we had an unusually hot and rainy summer.  While we were camping for a week in July, the above plants succumbed to what appeared to be powdery mildew.  I planted some more seeds, outdoors this time, and grew several more plants.  Then, one day, I discovered this:

jarrahdale pumpkin flower

I have my doubts as to whether it will have time to fully develop before it gets too cold, as we are in October now.  The pumpkin plants seem happier than they did in the oppressive heat, though.  I’ve tried not to meddle with these plants too much, although I did break the remaining flowers off this plant today, in the hopes that it will put its energy into the baby pumpkin instead.

In any event, this has been a fun project.  I may have to visit that farmstand again this year, so I can make more pumpkin soup soon!

Fall Nature Study: Saving Seeds

Fall Nature Study_ Saving Seeds

Each spring, my children and I start seeds for nature study.  Eventually, we transplant them to the garden, care for the plants and harvest the fruit.  A few years ago, we decided to allow the process to come full circle by learning how to save the seeds as well.  There are a few different ways to save seeds for your plants and it depends on the type of seed.

Bean plants are easy to save seed from.  You simply leave some of the pods on the plant until the fall, when the skin of the bean in completely dry and papery.  Then, you pick them, remove the beans from the skin and label an envelope to save them in for planting in the spring.

Many other seeds can be saved by fermenting.  The fermentation process can help control seed-borne diseases from affecting your future plants.  We have saved tomatoes, peppers, eggplant, and pumpkins/squash this way.  Make sure the fruit is completely ripe first.  Remove some seeds, rinse any pulp off of them, and place them in a jar of water.  Stir the seeds carefully with a spoon once a day for about three days.  You will notice that some of the seeds float to the top and some sink to the bottom of the jar.  The floaters are not viable and can be discarded at the end of the third day.  Next, strain the contents of the jar, saving the seeds that sunk to the bottom.  I pour mine into a tea sock.  Then, I spread them on a plate until they are completely dry, at which point I seal them in a labeled envelope.

You may want to write the year that you saved the seeds along with the name of the plant, in case you do not plant all of them and have some leftover the next year.  I have successfully used seeds a couple of years after saving them, but they do decrease in viability with age.  Another trick for keeping them is to place the envelopes of saved seeds in a container in the back of the refrigerator.  The cold temperature keeps them fresh longer.

Interestingly, I found that the seeds that we planted this year that had been saved from our own garden actually grew much more robust plants than our store-bought seeds.  I am not sure if they were more acclimated to our particular soil, but I think it will make an interesting nature study experiment next spring, to compare our own seeds to the purchased ones and chart their progress.

Another fun activity that my children did was to set up a stand in our front yard and sell packets of saved seeds, sort of like a lemonade stand.

There’s something really special about planting seeds that you’ve saved from your own plants.  It gives children a visual of the way God provides for us and helps them to see the whole circle happening first-hand.

“Very truly I tell you, unless a kernel of wheat falls to the ground and dies, it remains only a single seed.  But if it dies, it produces many seeds.” – John 12:24

As an Amazon associate, I earn from qualifying purchases.

Grow an Avocado Tree from a Pit

pit in avocado

Last fall, after making some guacamole, I decided to grow an avocado tree from the pit that I’d removed from the avocado.  I mentioned in this post that it took until March to get a root.  I also mistakenly told you that the pointy end of the pit gets submerged in water.  Maybe that’s why it took so long to root!

There are a couple of ways to grow a tree from an avocado pit, but the one I’ve used is the toothpick method.  The steps are:

  • After carefully removing your pit from a ripe avocado, rinse it off and figure out which end of the pit is the top and which is the bottom.  The narrower end is the top and the broader end is the bottom.

pit

  • Insert 3 to 4 toothpicks into the seed, preferably on an angle.  Fill a jar with water and suspend the toothpicks on the mouth of the jar, with the bottom half of the pit submerged.

toothpicks

  • Place the jar in a sunny spot and refill as needed to keep the bottom half under water.  You can see the plant beginning to emerge from the top of the pit in this photo.

early april

  • As your tap root grows, you may need to move your pit to a taller jar or vase to allow it more room.  Mine had a huge tap root.

late april

  • When the roots have emerged and are well established, plant the pit in a pot with soil.  The top half of the seed should be exposed above the dirt.  I used a large enough pot to allow room for growth, so I would not have to re-pot it later.

May

  • Keep the pot in a sunny spot.  You can keep it outside, but if temperatures will drop below 45 degrees Fahrenheit, you should bring your avocado tree indoors.  Also, keep in mind that they do not like to become too moist.  I only water mine about once a week, unless the leaves look droopy and the soil seems too dry.

One mistake that I made was not to trim my plant back.  I read the recommendation to do this after it was way over 6 inches tall, and I as afraid to do it at that point.  This page has information on trimming your plant, which will encourage your tree to be bushy, rather than leggy, like mine.  It also explains how to plant your tree outdoors if you live in a warm enough climate.  We do not, so I am going to keep mine as a houseplant.

June

I keep mine in the front window of my house next to the front door and people are often curious about it, since you can clearly see the pit sitting above the soil at the base of the plant.  I’ve read that if an avocado houseplant bears fruit, it will take about 20 years.  My 22-year-old son joked that he is going to eat the first avocado that it produces, when he is 42!

August avocado

So, the next time you slice open an avocado, consider growing your own avocado tree.


Growing Things

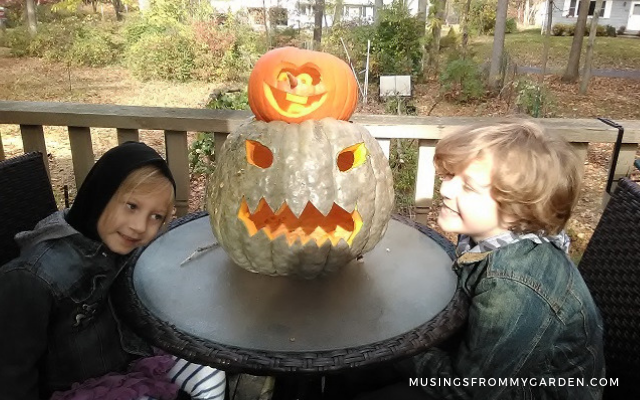
So, this happened on Monday. . .

winterwonderland2

. . .and so did this.

snowy yard

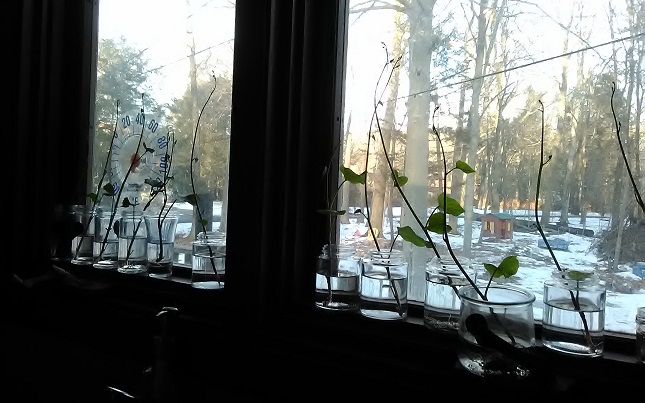
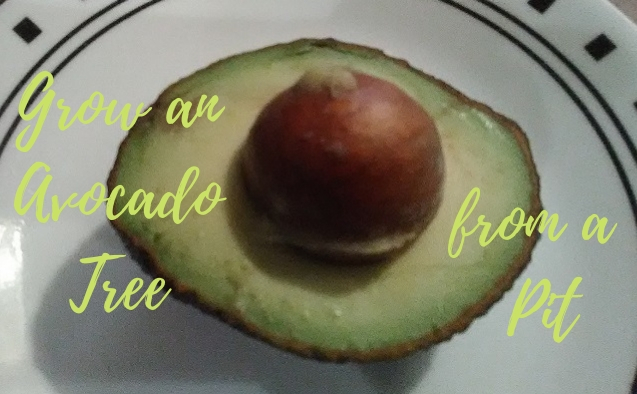
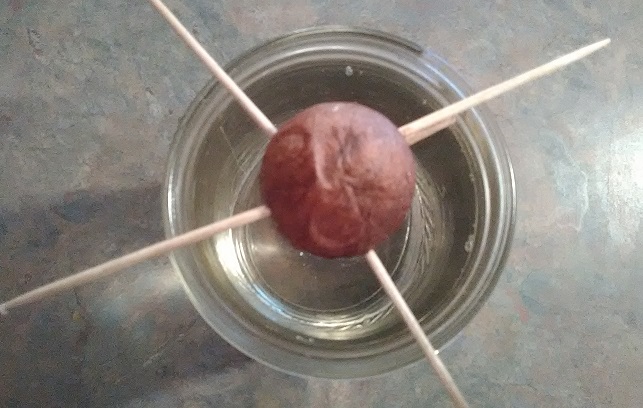
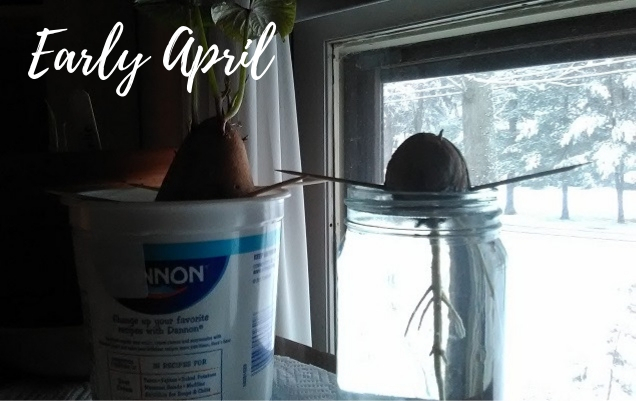
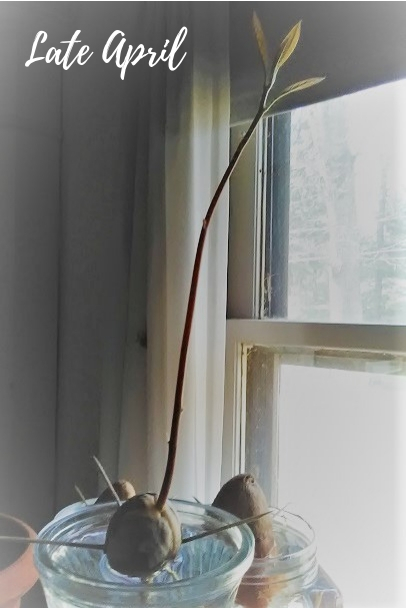
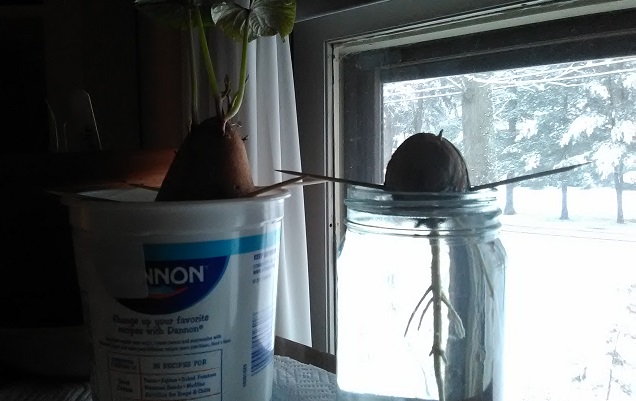
This avocado pit has been sitting in a jar of water since the fall.  I grew an avocado plant a couple of summers ago that got big enough to transplant to a pot, until my daughter’s cat got to it and ate it.  All it takes is a few toothpicks, a jar and some water, so (after making some guacamole) I decided to try again.  The pointy end of the pit goes in the water.  This took until March to get a root, and I’ve been watching it get bigger and bigger, anxiously waiting for that stem to emerge at the top.

garlic

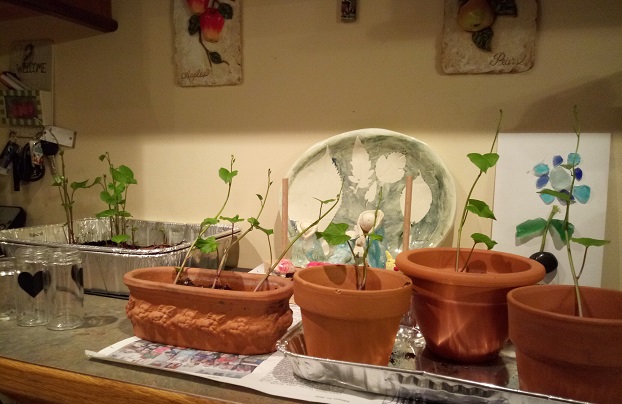
Another kitchen experiment that I’m trying is garlic.  I had a store-bought clove that sprouted, so I planted it, along with a couple of others from the same bulb.  My son and I put potting soil in the pot, moistened it, and gently pushed the cloves (sprout side up) down into the dirt.  These came up quickly!  Garlic doesn’t do well in our garden, so I’m trying the container method this year.  After opening these bulbs up tonight, it looks like we’ll be planting some more.

IMG_20180406_170127

We also started some lily seeds.  I had some lilies come up in my yard last spring whose bulbs had been given to me by a friend and planted a couple of years before.  I saved seeds from them, but didn’t know what type they were.  We also gathered seed from some lilies around town, so they could possibly be from different types.  It turns out that lilies are kind of complicated to grow.  Some types are epigeal and some are hypogeal.  I guessed that these were hypogeal and the kids followed these directions, to put the seeds in moist peat moss in sandwich bags.  I’ve been keeping them on a seed heating pad.  So far, nothing has happened.  However, looking at photos of lilies this week, I realized that the ones in my yard are Asiatic, meaning that they are epigeal.  So, we planted some in a seed-starting greenhouse today, along with some vegetables and other flowers.  We’ll see which method works!

IMG_20180406_185036

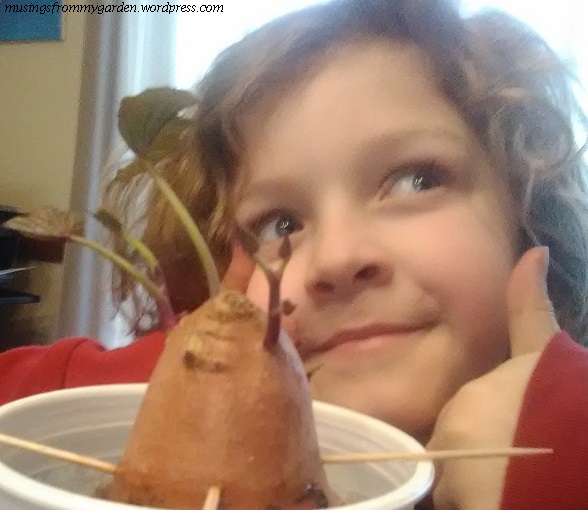
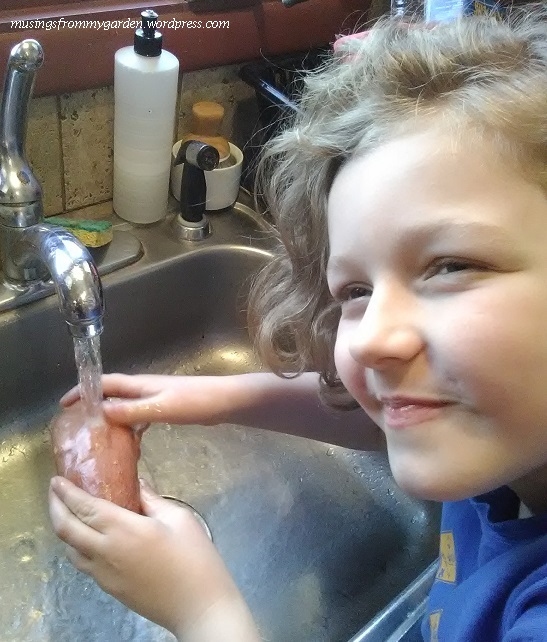
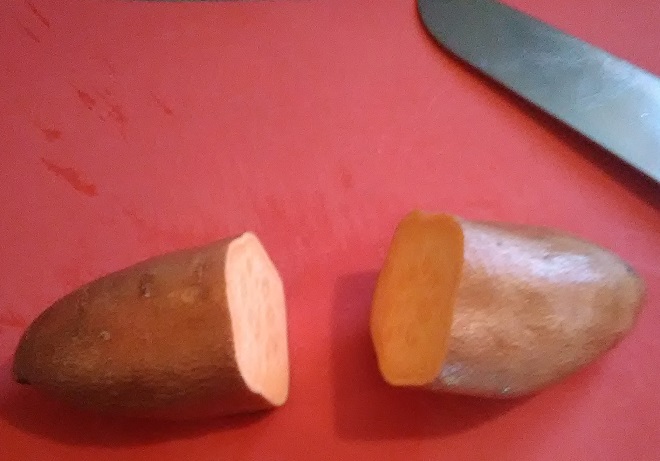
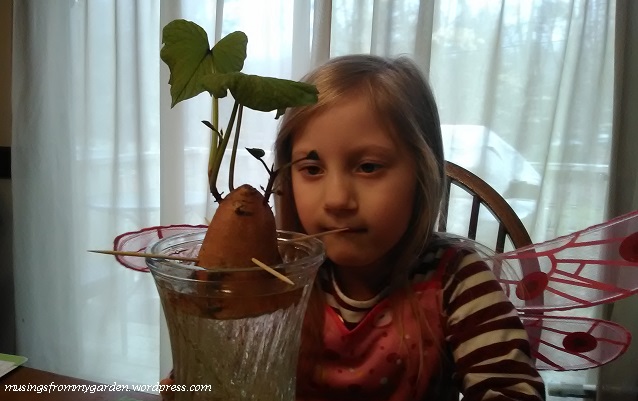
My daughter’s sweet potato is crazy with slips!  My son’s half finally got roots, but we discovered today that it was rotting, so we tossed it in the compost bucket.  Luckily, the second sweet potato that we started is progressing nicely.  Both halves have nice roots and a little slip is beginning to emerge on one half.  He recently figured out how to download photos that I take and insert them into a Word document, so he has been using them to create his own report on the progress.  He calls it his “homesteading book.”

1

It snowed again this morning, but the sun came out in the afternoon and it warmed up, so we took advantage of that to plant the seeds that I’ve been meaning to get to for a couple of weeks.  Here’s hoping that we are officially done with snow and it will finally begin to feel like spring!


“To everything there is a season,

A time for every purpose under heaven:

A time to be born, and a time to die;

A time to plant, and a time to pluck up that which is planted.”

– Ecclesiastes 3:1-8


Starting Sweet Potato Slips as Nature Study

sweet potato 1

Now that spring is here, my children and I are spending a lot of time studying nature.  We are classical homeschoolers, but we incorporate some of Charlotte Mason’s ideas about education into our homeschool, especially her emphasis on nature study.

The first thing we decided to grow this year was sweet potatoes.  My son came home from Cub Scouts last spring with a sweet potato in a cup of water, and we patiently waited for something to happen.  It took quite a while, and I was on the verge of throwing it out, when it finally got roots.  Eventually, we transplanted the slips to the garden.  It was a bit late in the growing season, so the sweet potatoes that were produced were pretty small, but still tasty.  This year, we figured we’d get a head start, and hopefully, end up with a larger harvest.

washing sweet potato

To start your own, follow these steps:

  1. Buy some organic sweet potatoes from the store.
    1. Technically, you should be able to use any sweet potato, but most conventional potatoes are treated with chemicals that prevent slips from growing.
  2. Wash your sweet potato.
  3. Cut it in half.
  4. Stick 3-4 toothpicks in, across from each other, about halfway down your potato.
  5. Balance the toothpicks on the edge of a wide-mouth jar. We’re using salsa jars.
  6. Add enough water so that half of the potato is submerged.
  7. Keep them in a warm, dark spot for the first week. We placed ours in a cabinet above the refrigerator.
  8. Check the water level and refill as needed. Change the water if it becomes cloudy.

chopped sweet potato

Keeping them in a cabinet for the first week is a trick I just learned, and roots appeared much quicker this year than they did for us last year.  After that, you can move your jars to a warm, sunny spot.

sweet potatoes in jar

We’ve been making official observations on their progress every Monday.  I ask my children what changes they notice, we discuss it, and they update a nature journal page.  We’ve been using a template that we used to chart tomato seed progress last year and it’s worked really well for us.  I found it on Notebookingpages.com.  They are very compatible with a Charlotte Mason approach to education.

Here are some of the ways that we have used these pages over time:

nature study pages

Eventually, your sweet potatoes will grow little plants on top called “slips.”

  1. When the slips reach 5-6 inches high, you can carefully pull them off and place the roots in a glass of water with the leaves above the liquid.
  2. Put them in a sunny spot and allow them to keep growing. Your sweet potato should continue to produce new slips.

At this point, you can take your study even further, if you like, and plant the slips.  When the ground is warm enough (at least two weeks after your last frost date), they can be planted in the garden.  You can plant them directly in the ground or in a container.  We used a large 10-gallon bucket last year.

sweep potato bucket

To plant your slips in a container:

  1. Drill holes in the bottom of the bucket.
  2. Find a spot next to a fence or trellis for the plant to climb.
  3. Prop the bucket up on something to allow for drainage underneath.
  4. Add a mixture of potting soil, peat moss, and manure to the bucket.
  5. Moisten your soil well, keep it loose, and shape it into a slope.
  6. Plant your slips on their side, with the top end toward the fence.
  7. Water as needed to keep the soil moist.
  8. When the leaves have dried out and turned yellow in the fall, dig up your sweet potatoes.
  9. Cure them in a cardboard box, unwashed, in a cool place (55 to 60°) for about 6-8 weeks for maximum sweetness.

One of the things we liked about growing them was that they were low maintenance.  The plants are a pretty addition to the garden as well.  I hope you enjoy growing sweet potatoes as much as we do!

pinkk flowers

It’s Time to Start Seeds!

green grass close-up in spring

As spring approaches, I am looking forward to what has become a homeschool ritual for us at this time of year – starting seeds.  When my son was in kindergarten, I decided that would be a good science lesson for him.  However, it became a learning process for me as well.

After growing seedlings indoors, we ended up transplanting them outdoors after the ground thawed.  We learned about caring for the garden, when to harvest the fruit and vegetables, and finally, how to save seeds for the next year.  Each spring, we begin the process again and try new things.  We experimented with starting the seeds in different types of containers, growing various types of plants, and planting them in the garden in new ways.  We have tried a raised pallet garden, container planting, and a hugelkultur.  We learned how to compost.  We fought with powdery mildew, blight, pests, and made homemade sprays to deal with some of these issues.  We learned about pollination and even hand-pollinated some squash.  We expanded our garden last summer and let the area that comprised the original garden lay fallow.  This summer, we will test whether that has a positive impact on our plants.

If you would like to try seed-starting with your children:

  1. Find out your plant hardiness zone to figure out what seeds to plant and when.
  2. Gather supplies.
    1. Pick a container. You can order a seed-starting kit, use egg cartons, Styrofoam cups, peat pots, etc.
    2. Pick seeds. Tomatoes, peppers, eggplant and some flowers are often started inside.
    3. Pick up some seed-starting soil. You can make your own or buy it, but it is different than regular potting soil.
    4. Download one of the free plant life cycle worksheets or seed journals that are available online to teach your children about the process.
  3. Place some soil in your chosen containers, water well and add a seed to each. Push carefully into soil.  Cover with plastic wrap.  Prick small holes in the plastic wrap as well as the bottom of your containers for drainage.  Keep in a warm spot or place on a seed heating mat.
    1. Label each seed! We write on plain popsicle sticks that we insert in the soil.
    2. Water often, but use something with a gentle flow, to avoid displacing seeds. We’ve used a spray bottle or a water bottle with a small hole made in the cap.
  4. Once the plants emerge, remove plastic wrap and move into a sunny spot.
  5. When the seedlings get their second pair of leaves, move to larger pots with plenty of compost.
  6. If you are going to transplant to the garden, harden them off about a week before planting.

Of course, not everyone has a backyard that is large enough for a vegetable garden.  One friend of mine starts seeds with her children indoors and they watch the seedling grow, but the process ends there.  Another grows her plants in containers.  There are many ways to incorporate it into your homeschool, regardless of whether you live in a rural or urban area.

I have found it to be such a rich learning experience.  Not only is it hands-on, but it inspires awe in the perfection of God’s creation and His provision for us.