For the last two years, we’ve started sweet potato slips as a nature study project and eventually transplanted them to a container in our vegetable garden. The first year, we only ended up with some small potatoes, which I sliced up and cooked in a pot of chili. Last year, we started them earlier and supplemented with some slips that I purchased. The result was this:
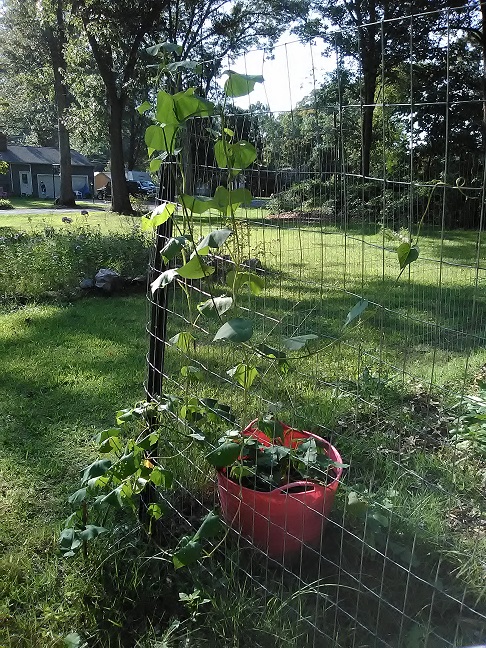
In October, frost was threatening and we dumped the bucket they were planted in. We didn’t get a huge haul, but it was an improvement over last year.

I cured them in a cardboard box with some holes poked in it that I kept in the kitchen for warmth. I finally baked the largest ones in the end of November. They were so delicious! They had a creamy texture that I’ve never experienced in a sweet potato before.

I started looking up recommendations on the best time to start my slips. I read that the fresher your sweet potatoes are, the more slips they will produce. I also came across some videos from people saying that they had better success with the dirt method than the water method, which is what I’ve used in the past. I was curious to try it, especially since some of my potatoes took so long to sprout last year that the potatoes started to get too mushy for the toothpicks to support them anymore and I ended up having to throw some of them out.
In mid-December, I followed these instructions to start slips using the dirt method:
- Buy some organic sweet potatoes. Most conventional potatoes are treated with chemicals that prevent slips from growing.
- Get two disposable, aluminum baking pans approximately 3 inches deep.
- Poke a couple of holes in each side of one of the pans for drainage.
- Place something small in each corner of the other pan (I used extra Play Doh lids) and put the pan with holes inside, on top of the lids. This gives extra moisture somewhere to escape.
- Fill the pan halfway with potting soil and lay your sweet potatoes in the pan, covering them part of the way with soil, but leaving the top half exposed.
- Put your pan on top of a plant heating pad and keep it in a spot where it will get either sunlight or direct artificial light during daytime hours.
- Keep the soil moist. In a few weeks, you should begin to see little shoots emerging from your sweet potatoes and in the soil around them. These are your slips.
Since I had some small potatoes left from what I’d grown, I used those. I also put them in soil from the bucket I’d grown them in. I began to see slips appearing in late January. Once they began, they grew rapidly.

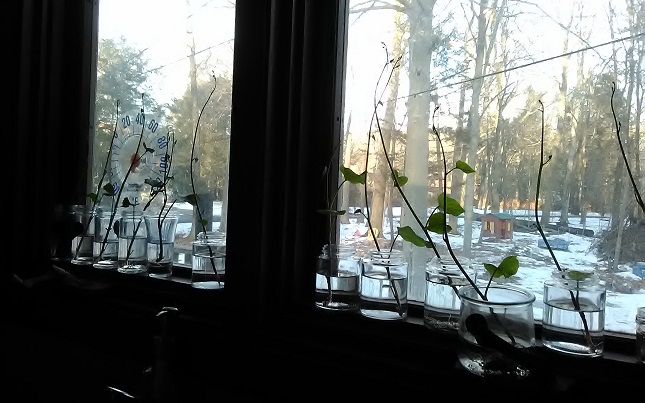
Once my slips reached at least six inches high, I removed them from the potatoes by grasping them as close to the base as possible and gently twisting them one way and then the other until they came loose. I placed them in a small jar of water in a sunny spot so they could grow roots. Since my window sills are small, I found that herb jars worked well. I made sure the water level was below the leaves.
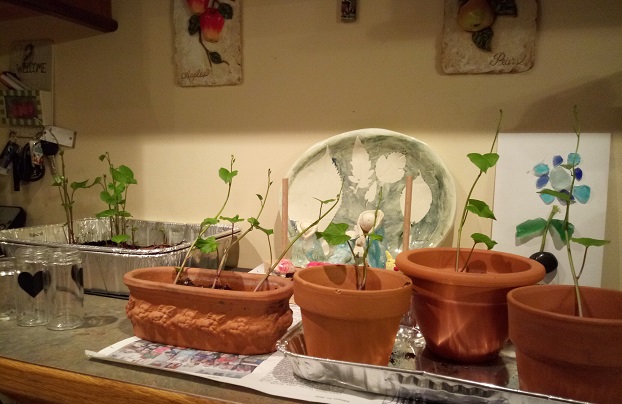
Now that some of them have nice, established roots, I planted them in pots to keep indoors until the threat of frost has passed. The sweet potatoes in the pan are continuing to produce new slips. At last count, I had about forty slips altogether, counting the ones I’ve already picked and the ones that are still in the pan. This is exponentially better than what I’ve been able to grow in the past using the water method. I believe that using potatoes from my own garden made a difference as well. They were grown organically, not treated with any chemicals, and very fresh.
Now, I just have to find room to keep all of these slips for the next two months, until I can plant them in the garden. I think I’m going to need more than one bucket this year!
Here is a post on the water method and the nature study pages that we utilized last year.
