
Here’s my latest post on the Homeschooling with Heart blog:
Nature Study: Sprouting an Avocado Pit in a Pot
In this post, I explain how we started a new avocado tree in a pot instead of in a jar of water.
Here’s my latest post on the Homeschooling with Heart blog:
Nature Study: Sprouting an Avocado Pit in a Pot
In this post, I explain how we started a new avocado tree in a pot instead of in a jar of water.

Here is a link to my latest post on the “Homeschooling with Heart” blog:
Nature Study: Starting Sweet Potato Slips with the Dirt Method
To see my post on starting sweet potato slips with the water method, click here.
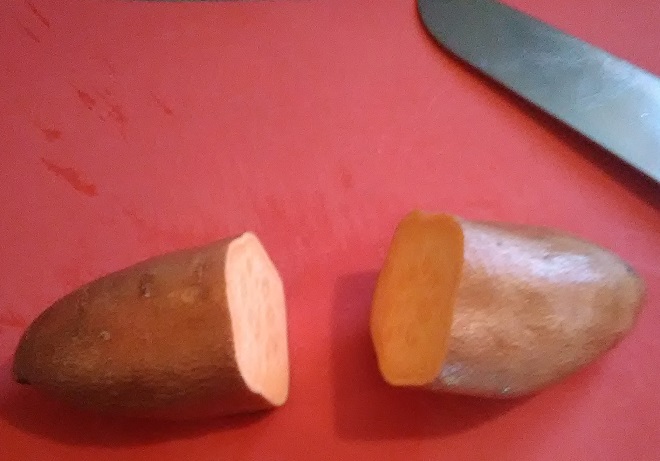
For the last two years, we’ve started sweet potato slips as a nature study project and eventually transplanted them to a container in our vegetable garden. The first year, we only ended up with some small potatoes, which I sliced up and cooked in a pot of chili. Last year, we started them earlier and supplemented with some slips that I purchased. The result was this:
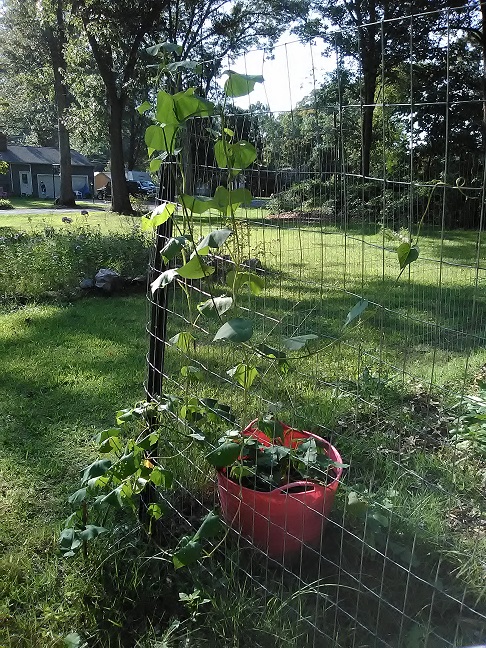
In October, frost was threatening and we dumped the bucket they were planted in. We didn’t get a huge haul, but it was an improvement over last year.

I cured them in a cardboard box with some holes poked in it that I kept in the kitchen for warmth. I finally baked the largest ones in the end of November. They were so delicious! They had a creamy texture that I’ve never experienced in a sweet potato before.

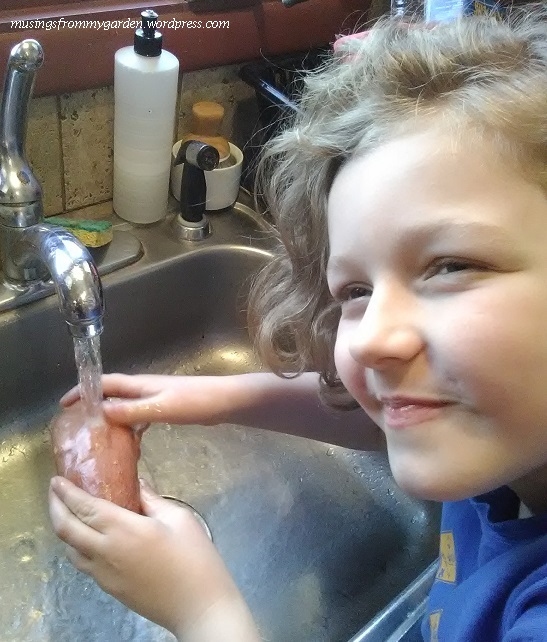
I started looking up recommendations on the best time to start my slips. I read that the fresher your sweet potatoes are, the more slips they will produce. I also came across some videos from people saying that they had better success with the dirt method than the water method, which is what I’ve used in the past. I was curious to try it, especially since some of my potatoes took so long to sprout last year that the potatoes started to get too mushy for the toothpicks to support them anymore and I ended up having to throw some of them out.
In mid-December, I followed these instructions to start slips using the dirt method:
Since I had some small potatoes left from what I’d grown, I used those. I also put them in soil from the bucket I’d grown them in. I began to see slips appearing in late January. Once they began, they grew rapidly.

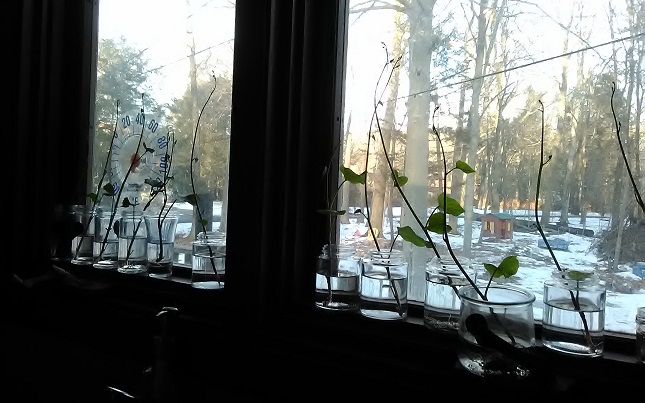
Once my slips reached at least six inches high, I removed them from the potatoes by grasping them as close to the base as possible and gently twisting them one way and then the other until they came loose. I placed them in a small jar of water in a sunny spot so they could grow roots. Since my window sills are small, I found that herb jars worked well. I made sure the water level was below the leaves.
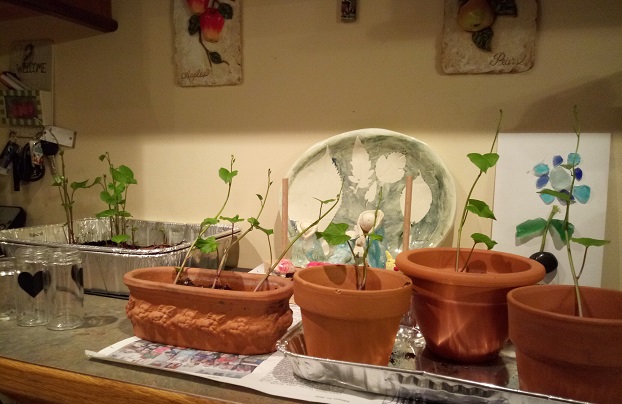
Now that some of them have nice, established roots, I planted them in pots to keep indoors until the threat of frost has passed. The sweet potatoes in the pan are continuing to produce new slips. At last count, I had about forty slips altogether, counting the ones I’ve already picked and the ones that are still in the pan. This is exponentially better than what I’ve been able to grow in the past using the water method. I believe that using potatoes from my own garden made a difference as well. They were grown organically, not treated with any chemicals, and very fresh.
Now, I just have to find room to keep all of these slips for the next two months, until I can plant them in the garden. I think I’m going to need more than one bucket this year!
Here is a post on the water method and the nature study pages that we utilized last year.

Each spring, my children and I start seeds for nature study. Eventually, we transplant them to the garden, care for the plants and harvest the fruit. A few years ago, we decided to allow the process to come full circle by learning how to save the seeds as well. There are a few different ways to save seeds for your plants and it depends on the type of seed.
Bean plants are easy to save seed from. You simply leave some of the pods on the plant until the fall, when the skin of the bean in completely dry and papery. Then, you pick them, remove the beans from the skin and label an envelope to save them in for planting in the spring.
Many other seeds can be saved by fermenting. The fermentation process can help control seed-borne diseases from affecting your future plants. We have saved tomatoes, peppers, eggplant, and pumpkins/squash this way. Make sure the fruit is completely ripe first. Remove some seeds, rinse any pulp off of them, and place them in a jar of water. Stir the seeds carefully with a spoon once a day for about three days. You will notice that some of the seeds float to the top and some sink to the bottom of the jar. The floaters are not viable and can be discarded at the end of the third day. Next, strain the contents of the jar, saving the seeds that sunk to the bottom. I pour mine into a tea sock. Then, I spread them on a plate until they are completely dry, at which point I seal them in a labeled envelope.
You may want to write the year that you saved the seeds along with the name of the plant, in case you do not plant all of them and have some leftover the next year. I have successfully used seeds a couple of years after saving them, but they do decrease in viability with age. Another trick for keeping them is to place the envelopes of saved seeds in a container in the back of the refrigerator. The cold temperature keeps them fresh longer.
Interestingly, I found that the seeds that we planted this year that had been saved from our own garden actually grew much more robust plants than our store-bought seeds. I am not sure if they were more acclimated to our particular soil, but I think it will make an interesting nature study experiment next spring, to compare our own seeds to the purchased ones and chart their progress.
Another fun activity that my children did was to set up a stand in our front yard and sell packets of saved seeds, sort of like a lemonade stand.
There’s something really special about planting seeds that you’ve saved from your own plants. It gives children a visual of the way God provides for us and helps them to see the whole circle happening first-hand.
“Very truly I tell you, unless a kernel of wheat falls to the ground and dies, it remains only a single seed. But if it dies, it produces many seeds.” – John 12:24
As an Amazon associate, I earn from qualifying purchases.
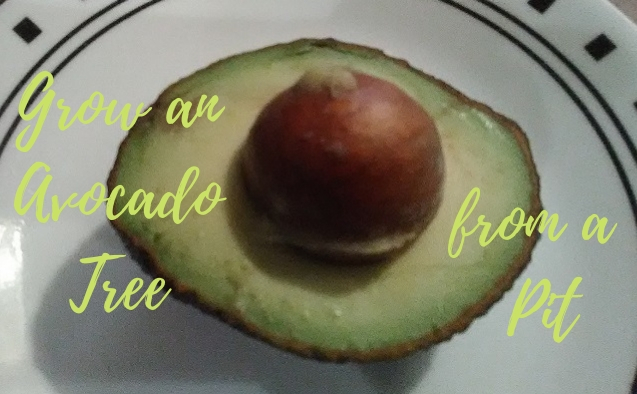
Last fall, after making some guacamole, I decided to grow an avocado tree from the pit that I’d removed from the avocado. I mentioned in this post that it took until March to get a root. I also mistakenly told you that the pointy end of the pit gets submerged in water. Maybe that’s why it took so long to root!
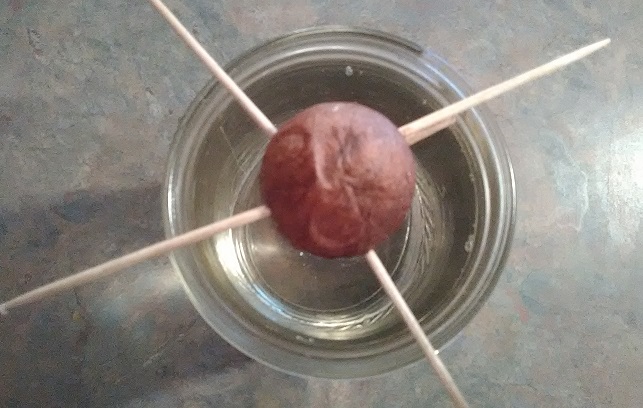
There are a couple of ways to grow a tree from an avocado pit, but the one I’ve used is the toothpick method. The steps are:

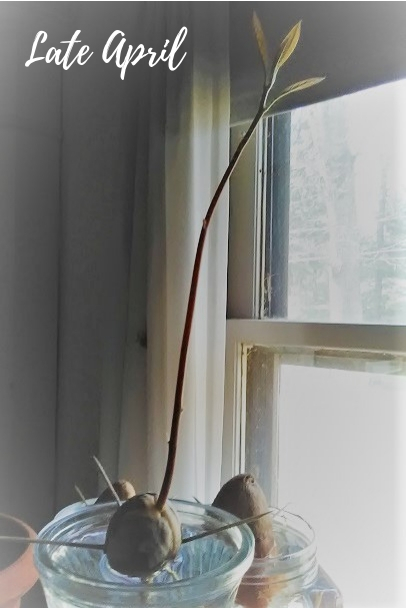

One mistake that I made was not to trim my plant back. I read the recommendation to do this after it was way over 6 inches tall, and I as afraid to do it at that point. This page has information on trimming your plant, which will encourage your tree to be bushy, rather than leggy, like mine. It also explains how to plant your tree outdoors if you live in a warm enough climate. We do not, so I am going to keep mine as a houseplant.

I keep mine in the front window of my house next to the front door and people are often curious about it, since you can clearly see the pit sitting above the soil at the base of the plant. I’ve read that if an avocado houseplant bears fruit, it will take about 20 years. My 22-year-old son joked that he is going to eat the first avocado that it produces, when he is 42!

So, the next time you slice open an avocado, consider growing your own avocado tree.
So, this happened on Monday. . .
. . .and so did this.

This avocado pit has been sitting in a jar of water since the fall. I grew an avocado plant a couple of summers ago that got big enough to transplant to a pot, until my daughter’s cat got to it and ate it. All it takes is a few toothpicks, a jar and some water, so (after making some guacamole) I decided to try again. The pointy end of the pit goes in the water. This took until March to get a root, and I’ve been watching it get bigger and bigger, anxiously waiting for that stem to emerge at the top.

Another kitchen experiment that I’m trying is garlic. I had a store-bought clove that sprouted, so I planted it, along with a couple of others from the same bulb. My son and I put potting soil in the pot, moistened it, and gently pushed the cloves (sprout side up) down into the dirt. These came up quickly! Garlic doesn’t do well in our garden, so I’m trying the container method this year. After opening these bulbs up tonight, it looks like we’ll be planting some more.

We also started some lily seeds. I had some lilies come up in my yard last spring whose bulbs had been given to me by a friend and planted a couple of years before. I saved seeds from them, but didn’t know what type they were. We also gathered seed from some lilies around town, so they could possibly be from different types. It turns out that lilies are kind of complicated to grow. Some types are epigeal and some are hypogeal. I guessed that these were hypogeal and the kids followed these directions, to put the seeds in moist peat moss in sandwich bags. I’ve been keeping them on a seed heating pad. So far, nothing has happened. However, looking at photos of lilies this week, I realized that the ones in my yard are Asiatic, meaning that they are epigeal. So, we planted some in a seed-starting greenhouse today, along with some vegetables and other flowers. We’ll see which method works!

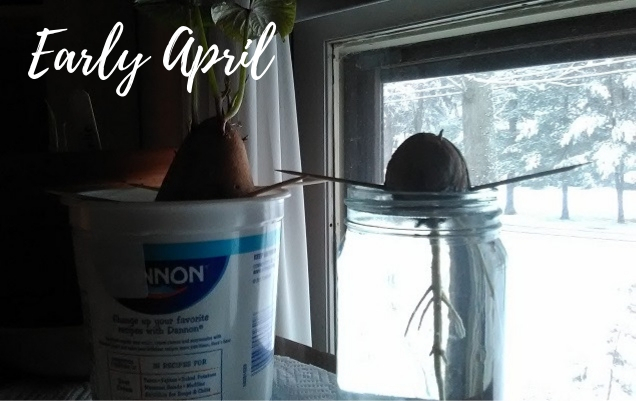
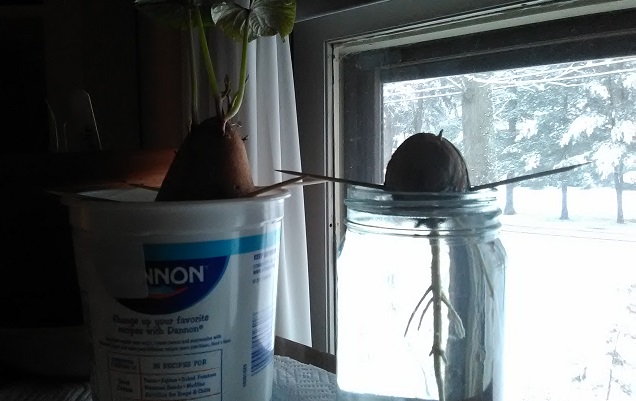
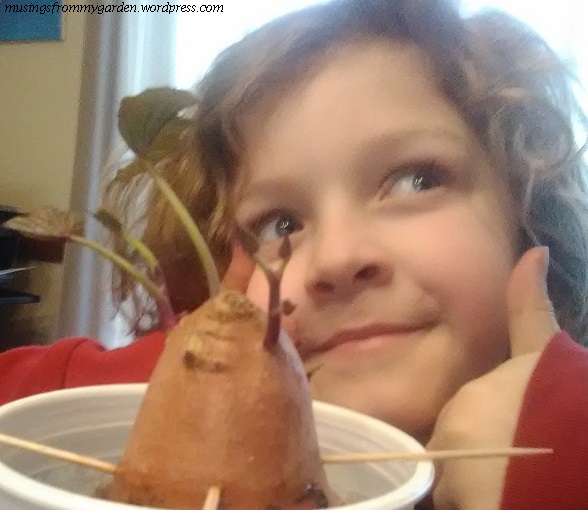
My daughter’s sweet potato is crazy with slips! My son’s half finally got roots, but we discovered today that it was rotting, so we tossed it in the compost bucket. Luckily, the second sweet potato that we started is progressing nicely. Both halves have nice roots and a little slip is beginning to emerge on one half. He recently figured out how to download photos that I take and insert them into a Word document, so he has been using them to create his own report on the progress. He calls it his “homesteading book.”
It snowed again this morning, but the sun came out in the afternoon and it warmed up, so we took advantage of that to plant the seeds that I’ve been meaning to get to for a couple of weeks. Here’s hoping that we are officially done with snow and it will finally begin to feel like spring!
“To everything there is a season,
A time for every purpose under heaven:
A time to be born, and a time to die;
A time to plant, and a time to pluck up that which is planted.”
– Ecclesiastes 3:1-8
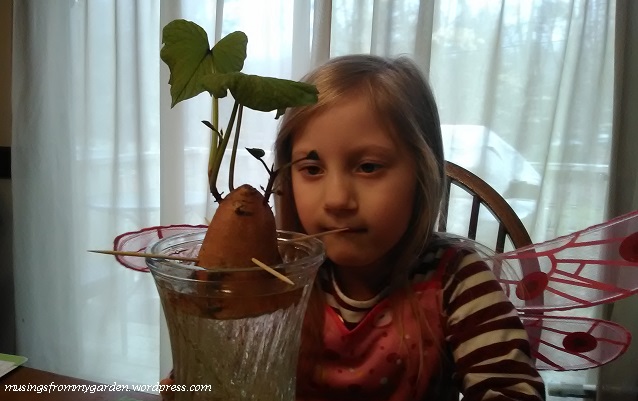
Now that spring is here, my children and I are spending a lot of time studying nature. We are classical homeschoolers, but we incorporate some of Charlotte Mason’s ideas about education into our homeschool, especially her emphasis on nature study.
The first thing we decided to grow this year was sweet potatoes. My son came home from Cub Scouts last spring with a sweet potato in a cup of water, and we patiently waited for something to happen. It took quite a while, and I was on the verge of throwing it out, when it finally got roots. Eventually, we transplanted the slips to the garden. It was a bit late in the growing season, so the sweet potatoes that were produced were pretty small, but still tasty. This year, we figured we’d get a head start, and hopefully, end up with a larger harvest.
To start your own, follow these steps:
Keeping them in a cabinet for the first week is a trick I just learned, and roots appeared much quicker this year than they did for us last year. After that, you can move your jars to a warm, sunny spot.

We’ve been making official observations on their progress every Monday. I ask my children what changes they notice, we discuss it, and they update a nature journal page. We’ve been using a template that we used to chart tomato seed progress last year and it’s worked really well for us. I found it on Notebookingpages.com. They are very compatible with a Charlotte Mason approach to education.
Here are some of the ways that we have used these pages over time:

Eventually, your sweet potatoes will grow little plants on top called “slips.”
At this point, you can take your study even further, if you like, and plant the slips. When the ground is warm enough (at least two weeks after your last frost date), they can be planted in the garden. You can plant them directly in the ground or in a container. We used a large 10-gallon bucket last year.

To plant your slips in a container:
One of the things we liked about growing them was that they were low maintenance. The plants are a pretty addition to the garden as well. I hope you enjoy growing sweet potatoes as much as we do!

